Emptied Recycle Bin files & Permanently deleted files recovery from Windows Recycle bin is made easy now with Windows File Recovery Tool..!
Accidentally deleting files and then realizing their importance can be a disheartening experience. However, there is hope! When you delete files on a Windows computer, they often end up in the Recycle Bin, providing you with a chance to recover them. In this comprehensive guide, we will walk you through the process of recovering deleted files from the Recycle Bin, ensuring that you can retrieve your valuable data with ease.
1. Understanding the Recycle Bin:
The Recycle Bin is a temporary storage folder on your computer where deleted files are kept until you choose to empty it. When you delete a file, it is moved to the Recycle Bin instead of being permanently erased from your system. This provides a safety net and allows for easy file recovery if needed.
2. Navigating the Recycle Bin:
To access the Recycle Bin, simply double-click its icon on the desktop. This will open a window displaying all the deleted files and folders stored within it. You can sort the files by name, size, deletion date, or other criteria to locate the specific file you want to recover.
3. Recovering Files from Window Recycle Bin:
To recover a deleted file, select it and right-click on it. From the context menu, choose the "Restore" option. Alternatively, you can drag and drop the file to a desired location outside the Recycle Bin window. The file will be restored to its original location before deletion, allowing you to access it once again.
4. Restoring Multiple Files:
If you have multiple files to recover, you can select them all at once by holding the Ctrl key while clicking on each file. Once you have selected all the desired files, right-click and choose the "Restore" option or drag them out of the Recycle Bin window. This method enables you to restore multiple files simultaneously, saving time and effort.
Recovering Emptied Recycle Bin Files:
If you have emptied the Recycle Bin or used the "Empty Recycle Bin" option, you might think your files are permanently lost. However, there are still chances of recovery. Third-party data recovery software, such as Recuva, EaseUS Data Recovery Wizard, or Stellar Data Recovery, can scan your system and attempt to recover the deleted files even after emptying the Recycle Bin.
Utilizing Third Party Recovery Software (Windows File Recovery Software) to Recover Files after Deletion/Emptying Recycle Bin:
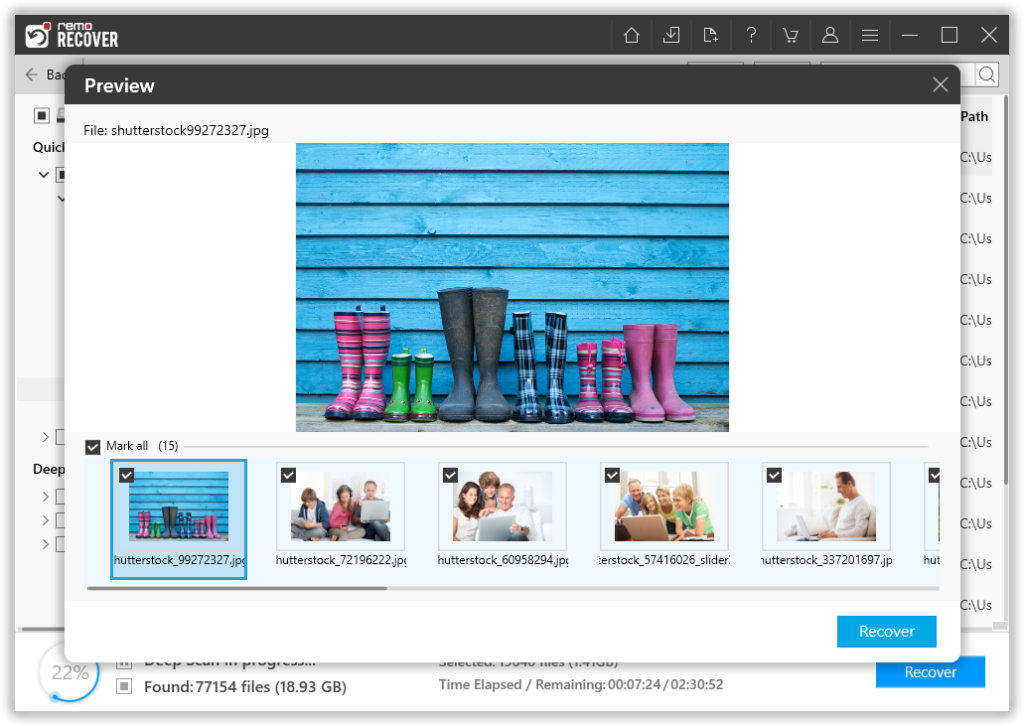
Once you realize that you have deleted all files from Windows Recycle Bin, stop using the drive immediately. Avoid downloading or installing any new application or data on your hard drive, as this can result in a permanent data loss. You can easily recover your deleted files from Recycle Bin by using the Windows File Recovery Tool. This is an efficient file retrieval application Windows that recover Recycle Bin on Windows 10, 8, 7, Vista and XP. It performs rigorous scanning to recover the deleted files from the Recycle Bin. It supports file restoration from all FAT and NTFS formatted partitions, it can restore files formatted drive. You can sort the recovered data based on name, date, size and file type. You can also view recovered files using the Preview option.
Steps to recover deleted files from Windows Recycle Bin:
Step 1: Launch the software on your Windows PC.
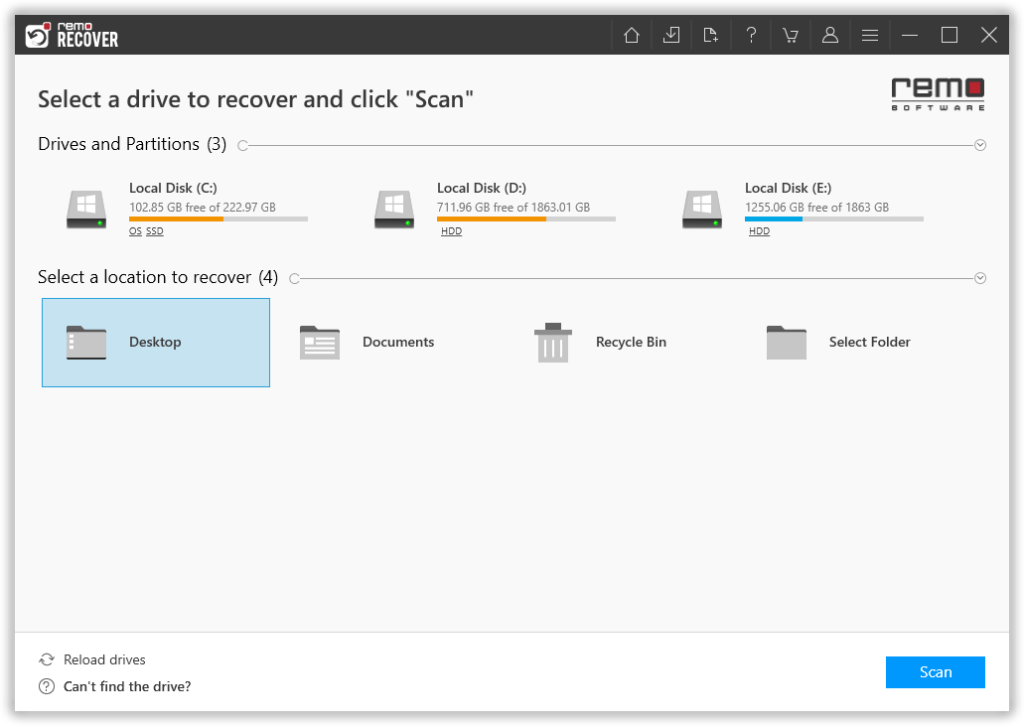
Step 2: From the main screen, you are asked to choose the drive or the folder from where you want to recover files and click on the Scan button.
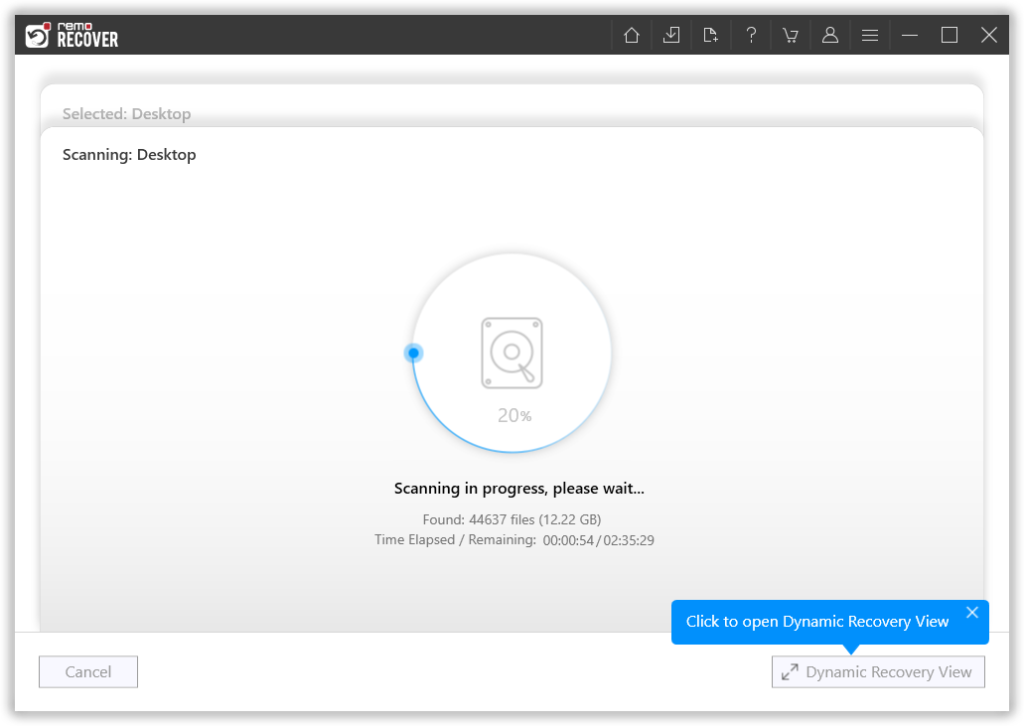
Step 3: The tool starts scanning the selected drive; you can use the Dynamic Recovery View option to view the file recovery process.
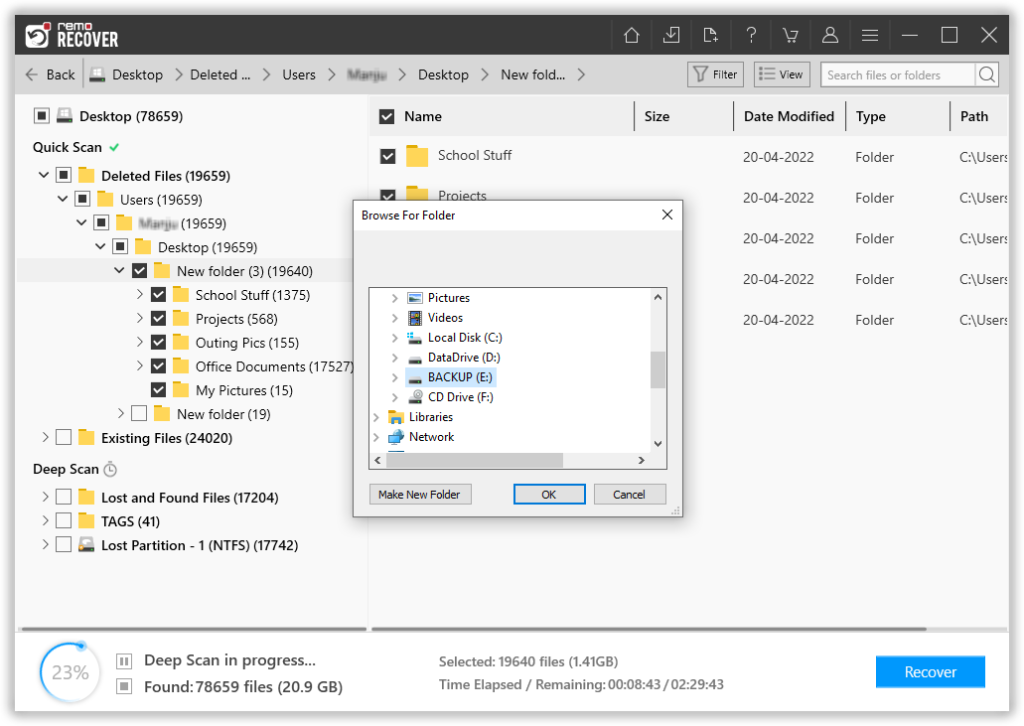
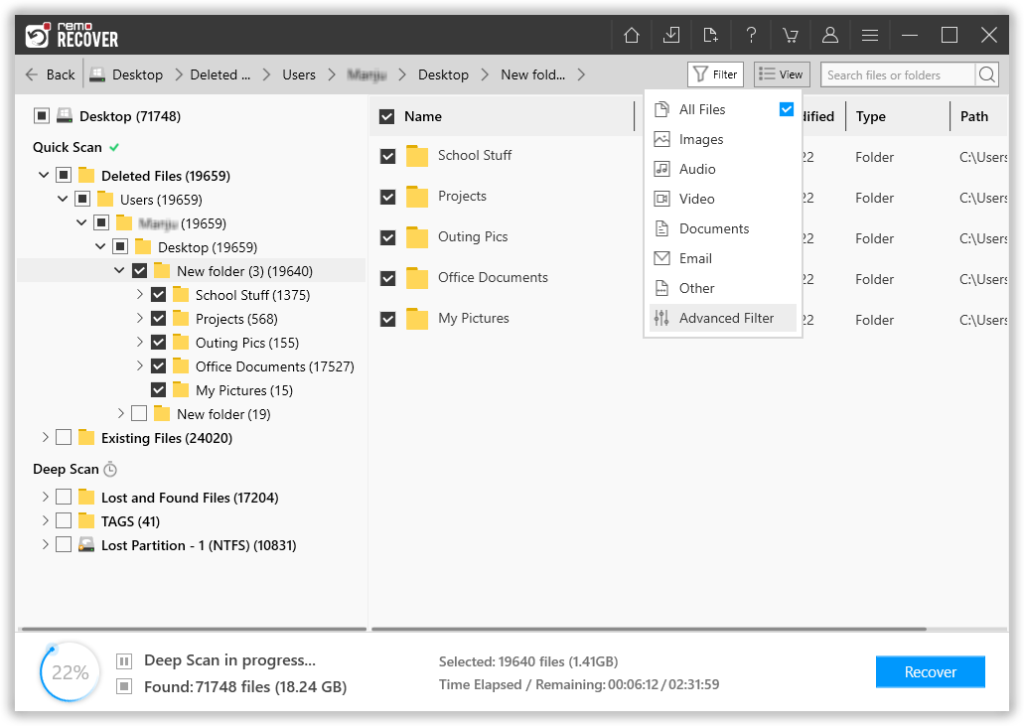
Step 4: A complete list of recovered files from the selected drive will get displayed on your screen. Options like the Advanced Filter option and the Search option come to help you effortlessly find the files that you are looking for.
Step 5: This software also comes with our most powerful feature to date, called the Augmented Preview option. To help you view the recovered files without having to save the data.
Step 6: The software also lets you select the file(s) that you would like to recover without bringing in any files and folders that you do not want to. The last step in the file recovery journey is to select a location where you want to save the recovered files.