FAT Recovery
The FAT Allocation Table or the FAT file system is a file system that is used in Windows OS, along with the NTFS file system. Though not so widely used in hard drives, FAT file system is widely used in most of the USB storage devices and on laptops. The FAT 32 file system, the most widely used among FAT file systems was introduced along with Windows 98 and was made use of in Windows Server 2000 and even Windows XP. Though the FAT file system was initially popular, it lost its prominence with the advent of the NTFS file system.
One of the major drawbacks of the FAT file system is the absence of crash recovery and security options. This increases the chances of data loss in a FAT file system, and also reduces chances of the data recovery of the same. There are various reasons for loss of data on a FAT file system, some of which can be described as follows,
- One of the most common causes of data loss on a FAT file system is due to accidental deletion of files/partitions.
- The second most common scenario in which data loss occurs on a FAT file system is when the user tries to convert from the FAT file system to the NTFS file system. However, you can employ this powerful application to restore accidentally deleted files from Windows 8 PC within a few clicks. For more information, click here https://www.windowsfilerecovery.net/accidentally-deleted-file-recovery-on-windows-8.html.
- Other than the above-given reasons, loss of data could also occur in a FAT file system due to the corruption of the system files, malware, virus attacks, re-partitioning the hard drive, etc.
No matter what the reason for data loss, you can make use of File Restore Tool Windows to recover all your deleted/lost data from FAT file systems. This Read-Only software ensures that none of your unaffected partitions get damaged during the recovery process. The software is capable of tracing a file by performing a comprehensive sector-by-sector search on the hard drive and can recover files after system crash from Windows 10, 8, 7, XP and Windows Vista OS. In addition, you can employ this tool to restore files on the Windows 8 computer, which is the latest version of the Windows OS family.
Note: Make use of this link to know how to recover files after a reinstallation of the Windows 7 operating system, visit this link: https://www.windowsfilerecovery.net/after-windows-reinstall.html
Steps to recover the formatted/reformatted FAT partitions on Windows
Step 1: Launch the software on your Windows PC.
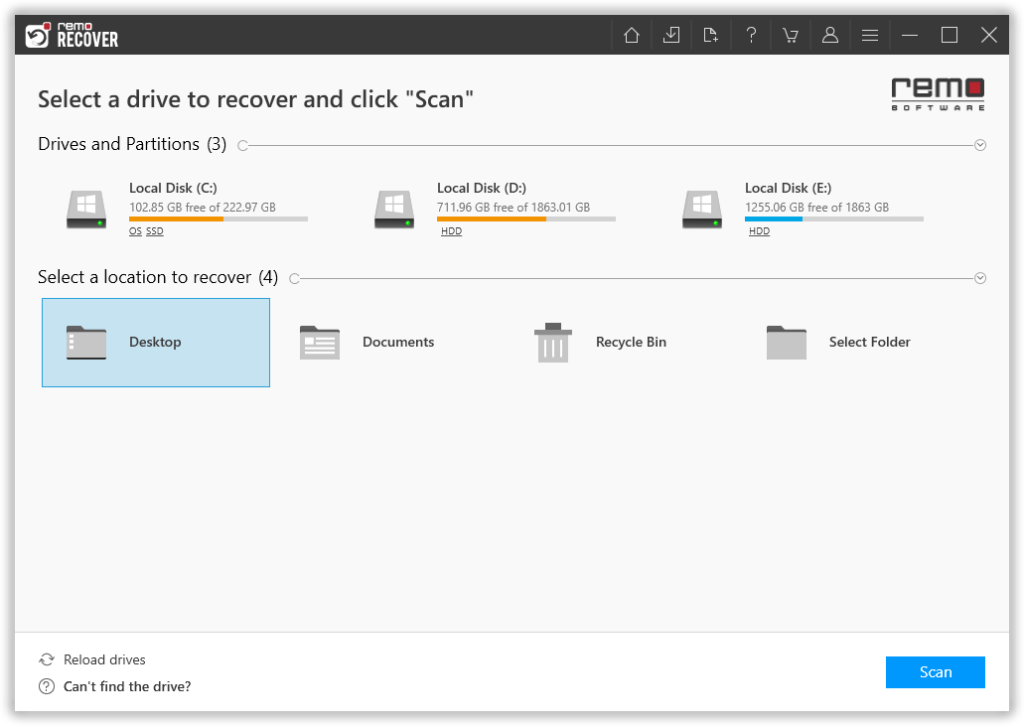
Step 2: From the main screen, you are asked to choose the drive or the folder from where you want to recover files and click on the Scan button.
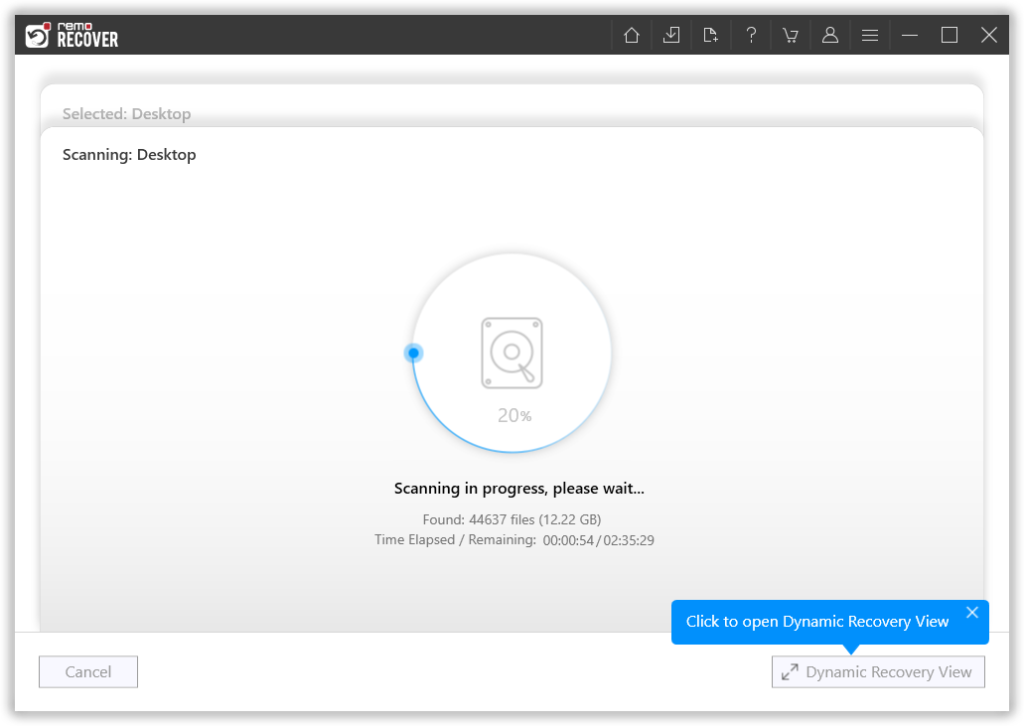
Step 3: The tool starts scanning the selected drive; you can use the Dynamic Recovery View option to view the file recovery process.
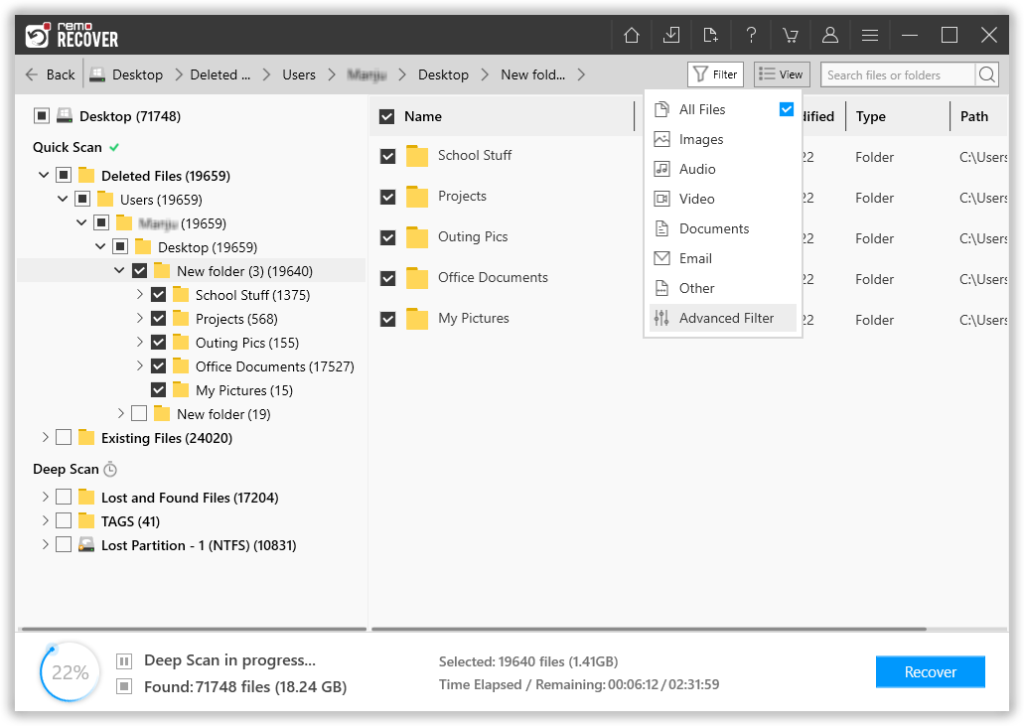
Step 4: A complete list of recovered files from the selected drive will get displayed on your screen. Options like the Advanced Filter option and the Search option come to help you effortlessly find the files that you are looking for.
Step 5: This software also comes with our most powerful feature to date, called the Augmented Preview option. To help you view the recovered files without having to save the data.

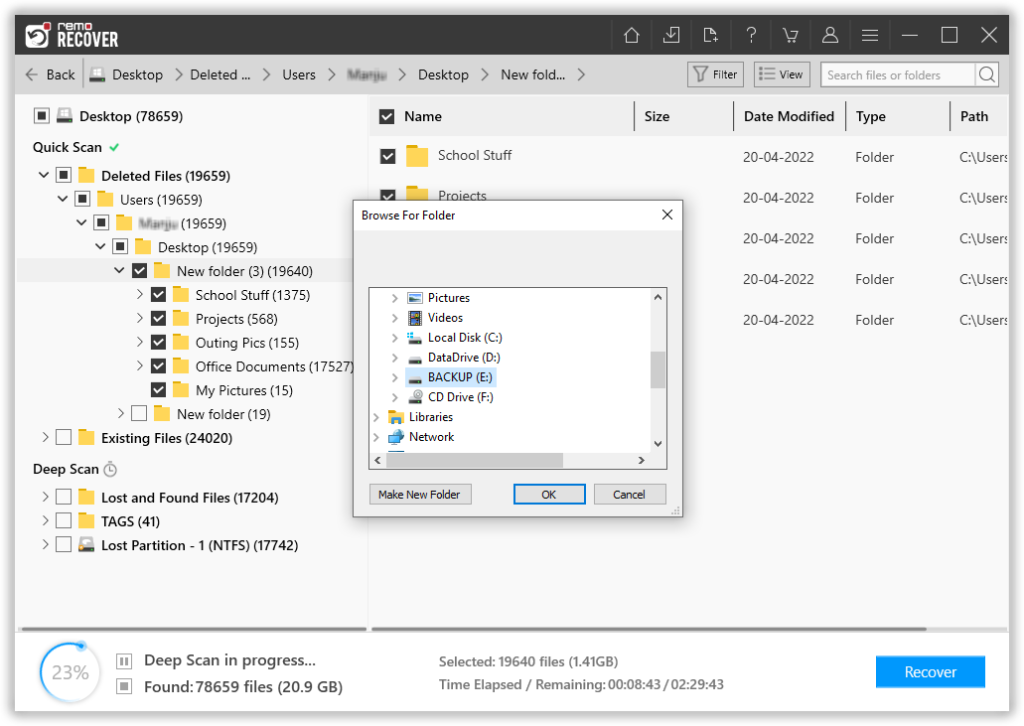
Step 6: The software also lets you select the file(s) that you would like to recover without bringing in any files and folders that you do not want to. The last step in the file recovery journey is to select a location where you want to save the recovered files.